JimStim Firmware V2.0
The JimStim firmware V2.0 is the latest firmware programmed into the JimStim CPU which is provided with the v1.4 board. The assembly instructions for the v1.4 board have not changed with this new firmware. However, the setup and some of the functionality has changed and the differences are presented below. And in order to not have to go through 2 different pages all of the setup instructions are presented here even if they have not been affected by the firmware change.
The new V2.0 features are presented here.
Wheel Mode Selection
The DIP switches to select which wheel will be simulated by the JimStim are shown below. DIP switch position 1 is not used at this time so should be left in the OFF position.
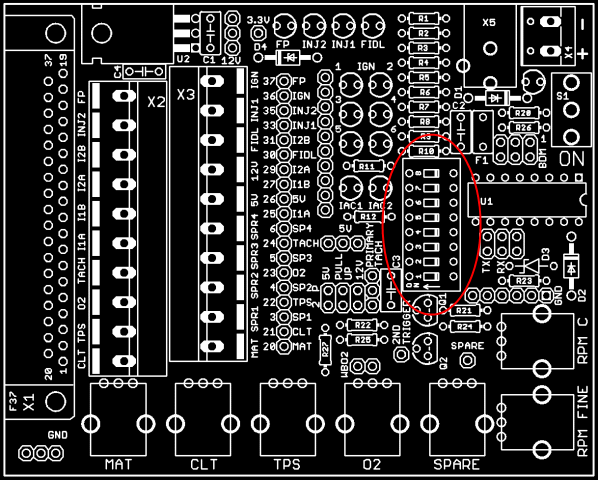
The DIP switches to use to select the wheel mode are shown here:
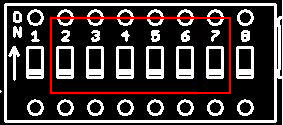
| DIP Switches | Wheel Mode | 2nd Tach Signal |
|---|---|---|
 | Distributor/EDIS | |
 | 36-1 | X |
 | 60-2 | X |
 | 4-1 | X |
 | 24/2 (Nippondenso) | X |
 | NGC 4 cyl. 36-1+1 | X |
 | 36-2-2-2 | X |
 | 6-1 | X |
 | Neon/420A | X |
 | 24+rising/falling (LS1) | X |
 | 12-1 | X |
 | Subaru 6/7 | X |
 | Trigger return dizzy | |
 | Oddfire dizzy | |
 | Mitsubishi 6G72 | X |
 | Enable serial port | |
 | 4/1 CAS | X |
 | 4G63 (Miata) | X |
 | Renix 44-2-2 | |
 | Twin trigger even | X |
 | Twin trigger odd | X |
 | Suzuki Swift | |
 | Suzuki Vitara 2.0 | |
 | Daihatsu 3 cyl | |
 | Daihatsu 4 cyl | |
 | Miata 99-00 | X |
 | Rover 36-1-1 | X |
 | Rover 36-1-1-1-1 | X |
 | Rover 36-2-2 | X |
 | Honda RC51 | X |
 | Chrysler 2.2/2.5 | X |
 | Do not select this | |
 | GM 7x native | |
 | 32-2 Harley | |
 | 6/1 | X |
 | 8/1 | X |
 | 10/1 | X |
 | Honda VTR1000 12-3 | |
 | IAW Weber-Marelli | X |
 | Fiat 1.8 16V | X |
 | Mitsubishi 360 tooth CAS (6 cyl) | X |
 | Mitsubishi 360 tooth CAS (8 cyl) | X |
 | 4.0 Jeep 2000 | X |
 | 3.7 Jeep 2002 | X |
 | NGC 6 cyl. 36-1+1 | X |
 | NGC 8 cyl. 36-1+1 | X |
Note: The above specifications and configurations may be subject to improvements and modifications.
Firmware V2.0.4 is modified from previous versions such that it now has:
- a 50/50 second trigger on the 36-1 wheel mode
- a corrected pattern for the following wheel modes
- LS1
- Chrysler 2.2/2.5
- GM 7x
Tach Signal Inversion
The DIP switch for selecting if the primary tach and secondary tach signals will be inverted is here:
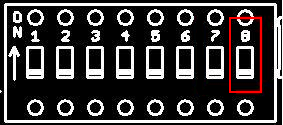
The DIP switch on the right (8) is for inverting both the primary tach and the secondary tach signals.

DIP switch on = primary tach and secondary tach signals inverted (shown left)
DIP switch off = primary tach and secondary tach signals normal
Tach Signals
(Unchanged from v1.4)
The picture below shows the position on the board of the pin headers for the primary and secondary tach signals.
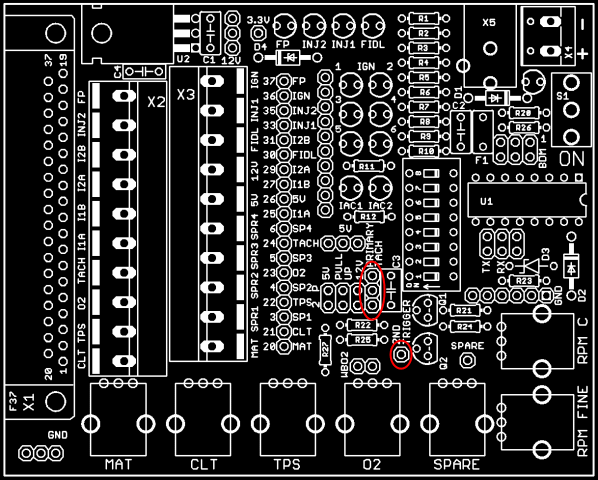
The primary tach signal has to be connected to the MS by using a jumper in one of the positions shown below. If the jumper is not installed, the tach signal from the JimStim CPU is not transmitted to the MS. The jumper allows the tach signal to either be a square wave signal (similar to a Hall sensor signal) or a VR signal emulation (not really VR signal-shaped but has zero crossings which works with an LM1815 circuit and the V3.0 VR conditioner). The pictures below show the two possible jumper positions. In effect, this jumper connects the JimStim's primary tach signal to pin 24 of the DB37. In the VR Emulation position, the tach signal goes through C3 before going to pin 24.
Square Wave Signal
VR Emulation Signal
If a secondary tach signal is needed, it has to be connected with a jumper wire from the 2nd trigger header pin to the appropriate pin on the header in the middle of the board (depends on how the 2nd trigger has been wired on the MS board).
If desired, an external signal can be used as primary tach instead of the signal generated by the JimStim. In that case, this external signal is connected to the middle pin of the 3-pin header (in lieu of the jumper). If an external secondary tach signal is used, it is connected directly to the appropriate pin on the header in the middle of the board depending on how the 2nd trigger has been wired on the MS board.
The tach signal will need a pull up if the MegaSquirt's tach circuit used does not provide it (such as the V3.0 standard tach circuits). You may apply one using jumpers on the header pins shown in the picture below.
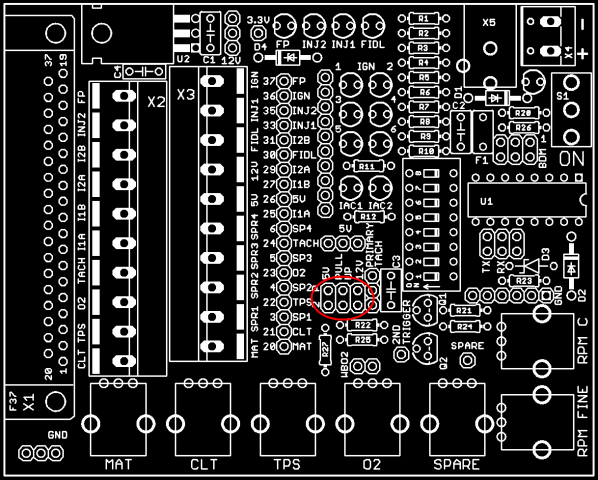
For a 5V pull up of the primary tach signal, a jumper is put between the top left pin and the top middle pin. For a 12V pull up of the primary tach signal, a jumper is put between the top middle pin and the top right pin. For a pull up on the secondary tach signal, the lower row of pins is used. The pictures below show the primary and secondary tach signals pull up jumper positions.
5V Pull Ups
12V Pull Ups
Wideband O2
(Unchanged from v1.4)
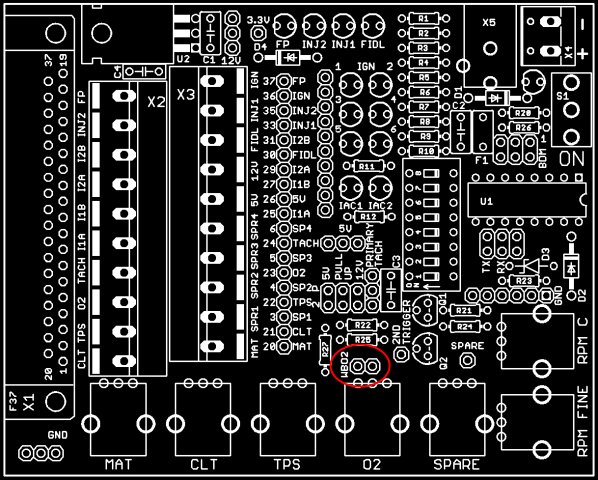
To simulate the signal from a wideband O2 sensor with the O2 potentiometer, a jumper must be placed on the 2-pin header just above the O2 potentiometer as shown in the picture below. If the jumper is omitted, the signal will simulate a narrowband O2 sensor.
Ignition and IAC LEDs
(Unchanged from v1.4)
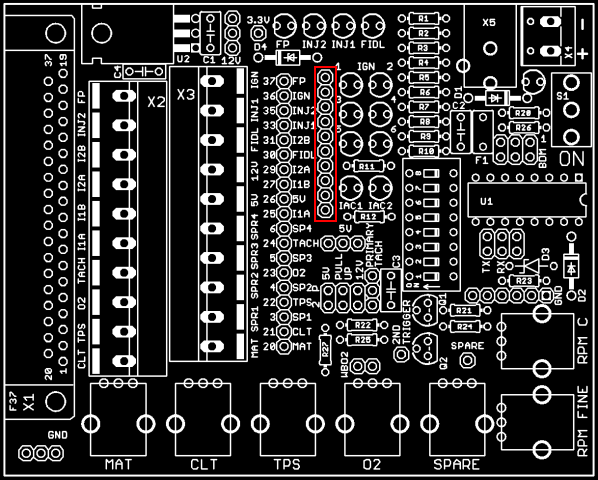
There are 8 auxiliary LEDs that can be used to show the ignition and IAC signals generated by the MegaSquirt board.
The first 6 LEDs are connected to the first 6 pins of the 10-pin header shown in the picture below and to 5V through resistors (R5-R10). To show the ignition output on a LED, the pin from the 10-pin header has to be connected to the DB37 using the correct pin on the 19-pin header on the left (or the corresponding screw terminal) using a wire jumper. Which DB37 pin to use depends on the hardware and firmware version and how the connections were made on the MegaSquirt board
The last 2 LEDs can be used to show the IAC outputs from the MS2 daughterboard. These LEDs are dual color LEDs and are connected to the last 4 pins of the 10-pin header: pins 7-8 for the IAC1 LED and pins 9-10 for the IAC2 LED. There is also a resistor in series with each LED (R11-R12). To show the IAC output, the 2 pins from the 10-pin header are connected to the A and B pins from the DB37 using the corresponding pins on the 19-pin header (or the screw terminals). The LED will then from red to green and green to red for each step commanded by the MS2 CPU.
The LEDs can also be used for other outputs. The first 6 LEDs can only be used for sink outputs and the 2 IAC LEDs can be used for any output with the correct connections. Warning: Do not connect a 12V supply or output on any of the first 6 pins of the 10-pin header because that will likely burn the LED and may even damage the MegaSquirt board.
Serial Communication and USB Power Supply
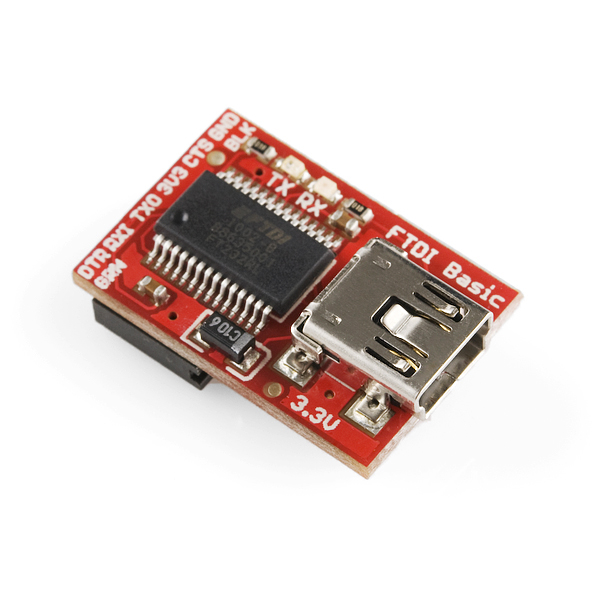
The serial communication with the JimStim CPU is done using the specific cable referred to in the v1.5 BOM. The cable is manufactured by FTDI and is shown below.
The cable is connected to the 6-pin header shown in the picture below. The cable has to be positioned such that the cable's ground (black wire) is on the right and the cable's green wire is on the left.
An alternative to the FTDI cable is available from SparkFun. The board is connected the same way as the cable above. However, it requires a cable in addition to the small board (USB A to miniB).
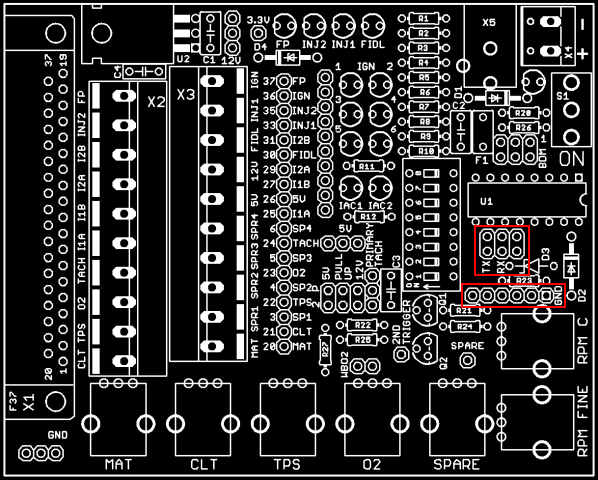
For serial communication, the "Enable serial port" wheel mode has to be selected: wheel mode selection DIP switches #3, 4, 5, 6 have to be put in the ON position and #1, 2, 7, 8 have to be put in th OFF position. Two jumpers have to be installed on the TX and RX pins on the 6-pin header (3x2 pins) shown in the picture below.
The jumpers are installed like this:
To power the JimStim and the MegaSquirt board from a USB port, a jumper is installed in the right most position of the 6-pin header shown in the picture below. The power supplied in this manner should enable the MegaSquirt to function in a minimal configuration but should not be used to program a new firmware version to the MegaSquirt CPU and might not allow burning new values to the flash memory.
If serial communication to the JimStim CPU is needed at the same time as powering from a USB port, all 3 jumpers described above are needed. If neither serial communication nor USB powering are in use, all jumpers should be removed.
Warning: Do not use any other cable than the one specified in the BOM and shown above or the alternative presented above. Failure to do so may result in permanent damage to the JimStim CPU and other parts of the JimStim.
Note: Do not leave the TX and RX jumpers in place when not using the serial interface. This will potentially lead to a wrong wheel mode selection.
Spare ADC Signal
(Unchanged from v1.4)
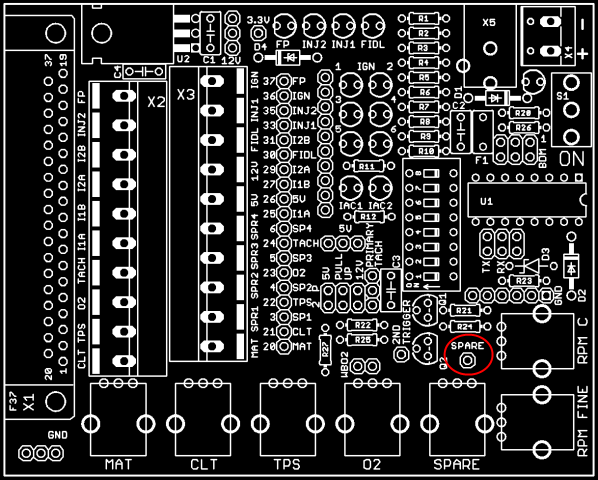
A potentiometer is available on the JimStim to provide a 0-5V signal to simulate a device which is connected to one of the spare ADCs of the MegaSquirt board. The pin header above the potentiometer shown in the picture below needs to be connected to the correct DB37 pin by using a wire jumper between the pin and the correct pin on the 19-pin header in the middle of the JimStim board (or the corresponding screw terminal). The DB37 pin to use depends on how the MegaSquirt spare ADC has been connected.
Firmware V2.0 Additional Features
The Firmware V2.0 has new features which require a serial connection as described here. It is possible to configure the JimStim remotely from the PC, upgrade the wheel patterns, and dynamically control the RPM.
Remote Configuration
It is possible to select the wheel mode, invert either the primary or secondary tach signal, set the RPM, and set the serial communication speed. Either Megatune or TunerStudio can be used to configure the JimStim. However, due to certain limitations in Megatune, it is preferable to use TunerStudio. The picture below shows the TunerStudio window.
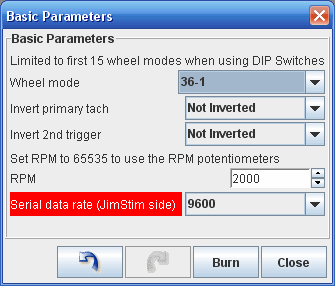
To control the RPM with the JimStim potentiometer while connected to the PC, the RPM is set to 65535 in the PC user interface. The "ini" file to use with TunerStudio is available here. The "ini" file to use with Megatune is available here and doesn't allow the selection of all wheel modes.
If using Megatune, the jimstim.ini.MT file, downloaded from above, needs to be copied to the mtCfg directory of the new JimStim project and renamed jimstim.ini. This megatune.ini file also needs to be copied to the same mtCfg directory.
If using TunerStudio, just create a new project and point to the jimstim.ini using Other as the ECU definition. Nothing else is needed.
The communication speed can be set to 9600, 19200, 38400, or 57600 baud. The tuner software communication has to be configured correspondingly. The default is 9600 baud and using a faster speed may impact the JimStim performance.
Wheel Pattern Upgrade
It is possible to upgrade the wheel patterns in the JimStim CPU. There is a small application that has been created that takes a text file and converts it into the binary data used by the JimStim processor. This data is then sent to the JimStim CPU and also copied to a binary file.
The source code is available here and the executable is available here. This is a command line Windows executable. The text file containing the current wheel patterns is available here.
Dynamic RPM Control
It is possible to dynamically control the RPM.
A small example application has been created that increases the RPM from 1000 RPM to 12000 RPM and back down to 1000 RPM. The source code is available here and the executable is available here. This code can be adapted to create any desired RPM pattern.
Ordering
Replacement CPUs with the V2.0.4 firmware are available for US$11.00 per CPU plus shipping. Please note that this is for the programmed CPU only and it will fit any version of the JimStim board. The replacement CPUs are also available from the JimStim vendors. Shipping for up to 4 CPUs is US$4.50 in North America and US$7.50 in the rest of the world. This is for regular mail shipping from Canada which means there is no insurance and no guarantee on the delivery time.
Please note that regular mail service to the US has been quite irregular. The delivery time has been from less than 2 weeks to more than 4 weeks. If this is not acceptable, you can request Xpresspost service which will speed up delivery but will cost an additional US$12. Contact me for details and price.
You can contact me through PM at the msextra forum where my user name is racingmini_mtl
or by email: boards at jbperf.com

